

How to Scan and Email a Document from a Printer

How to Scan a Document to Your Email
Need a copy of something in your inbox? Here's how to scan straight to your email from the office Xerox printer.
Steps
1. Place your document on the printer — face down on the glass for a single page or face up in the document feeder for multiple pages.
2. On the printer's touchscreen, tap “Email” (some screens show this as “Scan to Email”) from the home screen.
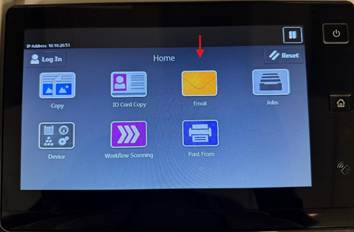
[Screenshot: printer home screen with the Email icon]
3. Enter the recipient's email address. If your email is already saved in the printer's address book, search for your name — otherwise tap “Manual Entry,” type it in, and confirm.
|
|
|
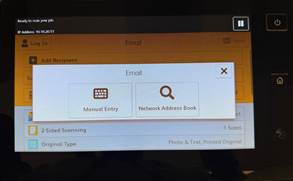
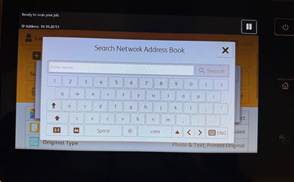
[Screenshot: email entry / address book screen]
4. (Optional) Adjust scan settings if you need to — PDF or JPEG, color or black-and-white, resolution. The defaults work fine for most everyday scans.
5. Tap the Send button.
6. Wait for the confirmation on the screen, then check your inbox (it usually shows up within a minute or two)
Quick fixes for specific problems
• “Email failed to send” — usually just a network hiccup. Wait a minute and try again. If it keeps failing, that's on IT's end (the printer's mail settings) submit a HappyFox ticket and we'll take a look.
• “The scan looks blurry or has lines through it” — the glass may just need a wipe-down with a soft, dry cloth. If that doesn't fix it, flag it to IT — the printer may need servicing.
• “I never got the email” — check your Spam/Junk folder first. If it's not there, double-check the address you entered and try again.
scanning to email takes about the same time as scanning to a shared folder, it just lands right in your inbox instead.
Internal ref: ORG-WI-DEV-003 (v0.1)

